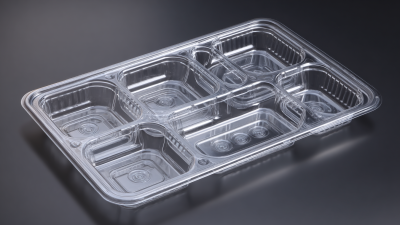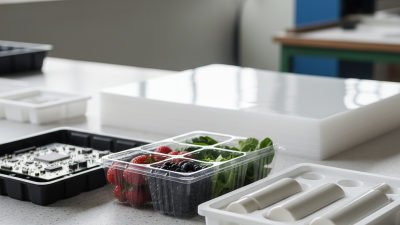
Vacuum formed trays are shaped plastic inserts designed to hold, protect, and present products with a close, stable fit. They appear in retail packaging, electronics, medical supplies, food applications, and industrial components. Their clean contours often look simple. The manufacturing process is not.
A typical tray begins with a plastic sheet, such as PET, PVC, HIPS, or recycled material. The sheet is heated until it becomes flexible, then positioned over a custom mold. A vacuum removes air between the sheet and mold, pulling the plastic tightly against every surface. After cooling, the formed sheet is released and trimmed to its final dimensions. Small holes, uneven edges, or excessive thinning can affect performance.
Material selection matters.
An experienced manufacturer checks temperature, wall thickness, mold design, and cooling time throughout production. For example, a tray holding metal parts may need stronger support than one carrying lightweight cosmetics. Clear plastic can improve product visibility, while textured surfaces may reduce sliding during transport. Quality inspections commonly examine fit, appearance, sharp edges, and dimensional accuracy.
The process is efficient, but it is not automatically perfect. Deep shapes may stretch unevenly, and complex corners can require careful mold adjustments. I have found that early prototypes often reveal problems that drawings miss, especially around product removal and stacking. This guide explains what vacuum formed trays are, how manufacturers produce them, and which practical details influence their reliability, cost, and final appearance.
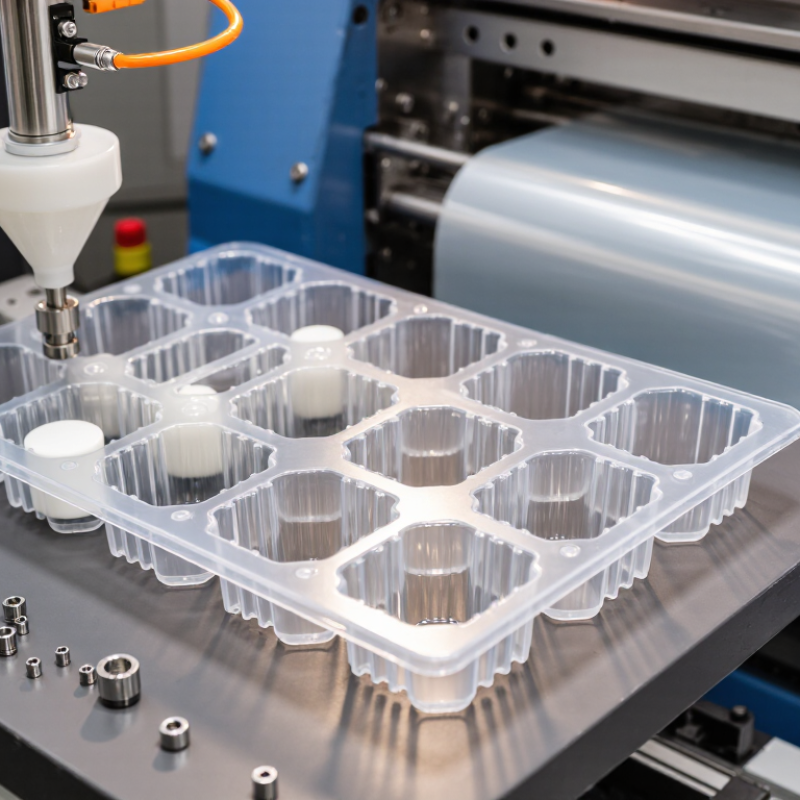
Vacuum formed trays are rigid plastic containers shaped over a mold using heat and controlled air pressure. They protect products during storage, handling, and transport. Their cavities can hold parts, food items, medical supplies, or delicate components. Each cavity is designed to limit movement and reduce surface damage.
The process begins with a flat thermoplastic sheet. A heating unit softens it until the material becomes flexible, but not liquid. The sheet then covers a mold containing the desired tray shape. Air is removed from beneath the sheet. Atmospheric pressure pushes the softened plastic tightly against the mold surface. After cooling, the formed sheet keeps its new shape. A cutting tool trims the outer edges and separates individual trays.
Small details affect the final result. Mold angles help the tray release without stretching or tearing. Even wall thickness improves strength and appearance. Excessive heat can cause thin corners, while insufficient heat leaves weak, uneven sections. In production, operators check temperature, vacuum timing, and cooling conditions for every material. The process sounds simple, but it is less forgiving than expected. Slight changes can alter cavity depth or product fit. A careful design review should test stacking, loading, cleaning, and real handling conditions before regular production.
What Are Vacuum Formed Trays and How Are They Made?
Vacuum formed trays begin with a heated plastic sheet pulled over a shaped mold. Common materials include PETG, HIPS, ABS, and PVC. PETG offers clarity and impact resistance, while HIPS is economical for light-duty packaging. ABS handles greater toughness, but it usually costs more. Material choice depends on temperature, product weight, visibility, and disposal requirements. Thickness also matters. A thin sheet may flex under load, while an overly thick sheet can form unevenly.
The equipment is simple in principle, but small settings affect the final tray. A forming machine uses infrared heaters, a mold, a vacuum pump, and a clamping frame. The heater softens the sheet until it becomes flexible. The mold then rises, or the sheet moves downward, depending on the machine design. Air is removed through tiny mold vents. This pressure difference pulls the plastic tightly around the shape. Operators must control heating time, vacuum strength, mold temperature, and cooling speed.
Mold design deserves careful attention. Draft angles help the tray release without distortion. Sharp corners often create thin spots, even when the finished surface looks acceptable. That detail is easy to miss. In practical production, trimming is usually handled by a router, die cutter, or CNC system. Edges should be checked for burrs and uneven height. A tray can look precise but still fail during stacking. Testing with the actual product remains more dependable than judging appearance alone.
| Dimension | Material, Equipment, or Process | Typical Characteristics | Role in Vacuum Tray Forming | Important Considerations |
|---|---|---|---|---|
| Product Definition | Vacuum formed tray | A shaped plastic component made by heating a thermoplastic sheet and drawing it over a mold with vacuum pressure. | Creates compartments, cavities, and protective surfaces for organizing or presenting products. | The final design depends on the mold geometry, sheet thickness, material properties, and draft angles. |
| Common Material | PET or recycled PET | Clear or translucent, lightweight, relatively rigid, and commonly used for display and packaging trays. | Provides product visibility and can be suitable for applications requiring recyclable packaging formats. | Recycled content may affect clarity, color, forming consistency, and material certification requirements. |
| Common Material | HIPS | A rigid, impact-modified polystyrene sheet that is generally easy to form and print. | Used for economical trays, inserts, and compartmented packaging. | Typically selected when cost, stiffness, and processing ease are more important than high transparency. |
| Common Material | ABS | A tough thermoplastic with good impact resistance and a broad processing window. | Used for durable trays, industrial inserts, and applications requiring greater mechanical strength. | Material selection should consider surface finish, forming temperature, and the required impact performance. |
| Common Material | PVC | Available in rigid formulations and can provide good formability and chemical resistance. | May be used for certain packaging and industrial tray applications. | Processing conditions and end-use regulations must be reviewed because additives and disposal requirements vary. |
| Common Material | PP | A lightweight polymer with good chemical resistance and a relatively high service-temperature range. | Used where toughness, low density, or resistance to moisture and chemicals is required. | PP can require carefully controlled heating and cooling because shrinkage and forming behavior differ from PET or HIPS. |
| Tooling | Forming mold | A male or female tool that defines the tray’s external shape, cavities, ribs, and stacking features. | Transfers the desired geometry to the heated plastic sheet. | Mold surfaces need adequate draft, ventilation, and a finish appropriate to the required tray appearance. |
| Tooling Material | Aluminum mold | A durable mold material with good thermal conductivity and dimensional stability. | Supports repeatable production and faster heat removal during forming and cooling. | It generally costs more than simple prototype tooling but is suitable for longer production runs. |
| Tooling Material | Epoxy or composite prototype mold | A lower-cost tooling option used for development, sampling, and short production runs. | Allows the tray design to be tested before investing in production-grade tooling. | Durability, heat transfer, and dimensional life may be lower than those of a metal mold. |
| Main Equipment | Thermoforming machine | A machine that heats plastic sheet, positions it over a mold, applies vacuum, and supports cooling. | Integrates the primary forming stages into a controlled production cycle. | Machine selection depends on sheet size, mold dimensions, production volume, automation level, and material type. |
| Heating System | Infrared or ceramic heaters | Heating elements that soften the sheet to a forming-ready condition. | Provide controlled heat across one or both sides of the plastic sheet. | Uniform temperature distribution is important because uneven heating can cause thin spots, webbing, or distortion. |
| Vacuum System | Vacuum pump and distribution channels | A vacuum circuit that removes air between the sheet and mold surface. | Pulls the softened sheet tightly against the mold to reproduce the tray geometry. | Vent placement, air-path design, and sufficient vacuum flow influence detail reproduction and forming speed. |
| Clamping System | Sheet clamp or frame | A mechanism that holds the sheet securely during heating and forming. | Maintains sheet alignment and helps prevent uncontrolled movement during vacuum application. | The clamping area must be compatible with the sheet dimensions and required material draw. |
| Forming Stage | Sheet heating | The thermoplastic sheet is heated until it becomes soft enough to stretch without tearing. | Prepares the material for controlled deformation over the mold. | The appropriate temperature varies by polymer grade, sheet thickness, heater setup, and machine design. |
| Forming Stage | Vacuum application | Air is evacuated from the space between the hot sheet and the mold. | Creates the pressure difference that shapes the sheet against the mold surface. | Fast, even evacuation helps capture fine details and reduces incomplete forming. |
| Cooling Stage | Air cooling or mold cooling | The formed part is cooled until it gains enough rigidity for safe removal. | Stabilizes the tray shape and reduces deformation after demolding. | Cooling rate affects cycle time, shrinkage, residual stress, and dimensional accuracy. |
| Finishing Equipment | CNC router, die cutter, or trimming press | Equipment used to remove excess flange material and create the final perimeter. | Produces a clean edge and brings the tray to its specified dimensions. | Cutting tools should match the material, wall thickness, edge profile, and required production volume. |
| Quality Control | Dimensional and visual inspection | Checks tray length, width, depth, wall consistency, surface quality, and formed features. | Confirms that the tray meets fit, appearance, handling, and packaging requirements. | Typical checks may include cavity fit, edge trimming, warpage, scratches, cracks, and incomplete forming. |
| Design Factor | Draft angle | A slight taper on vertical walls that helps the formed tray release from the mold. | Reduces demolding force and lowers the risk of damaging the part or tooling. | Deeper cavities and textured surfaces generally require more attention to draft and release behavior. |
| Design Factor | Wall thickness distribution | The final thickness varies as the sheet stretches over corners, walls, and deep cavities. | Determines tray stiffness, impact resistance, and material efficiency. | Deep draws, sharp corners, and uneven heating can create localized thinning and should be minimized. |
A vacuum formed tray begins with the product, not the machine. Designers measure its length, width, height, and fragile contact points. They also study how workers will lift, inspect, and remove each item. Small radii can hold parts securely, but sharp corners may block forming. Vent holes are positioned near deep sections to help the plastic follow the tool.
The design is converted into a forming mold, often with aluminum or a durable model material. The selected sheet is heated until it becomes flexible. It is then placed over the mold while a vacuum pulls the sheet tightly against every contour. Cooling locks the shape in place. Excess material is trimmed with a router, press, or cutting fixture. I have found that trimming accuracy matters more than appearance alone. A clean edge prevents snags during packing.
Testing should use real products and realistic handling. Technicians check fit, stacking, wall thickness, and removal force. They may also test the tray after repeated loading and transport movement. A first sample can look correct but still pinch a delicate surface. That mistake is useful. It exposes assumptions before production becomes expensive. Designers may adjust draft angles, add cushioning ribs, or move support points. Material choice also needs review, especially when heat, static, or repeated reuse affects performance. The final drawing should record dimensions, tolerances, inspection points, and approved changes. Small details matter.
Vacuum forming uses a heated plastic sheet, a shaped mold, and vacuum pressure to create a tray. The typical process includes heating, forming, cooling, and trimming.
The chart shows representative time ranges for common vacuum forming steps. Actual times vary with sheet thickness, polymer type, mold design, heating method, and tray size.
Vacuum formed trays begin with a careful design review. Engineers check the product’s shape, weight, and required protection. They also study draft angles, because vertical walls can resist removal from the mold. The mold may be made from aluminum, resin, or another heat-resistant material. Small vents are added to help air escape evenly.
The process starts when a plastic sheet is clamped above the mold. Heaters soften the sheet until it becomes flexible but not liquid. Temperature control matters here. Uneven heating can create thin corners or weak edges. The softened sheet then moves over the mold, while a vacuum pulls it tightly against the surface. This stage captures the tray’s depth, contours, and surface details. Operators watch the timing closely. A few seconds can change the final thickness.
After forming, the tray cools while staying supported by the mold. Cooling too quickly may cause distortion, while cooling too slowly reduces production efficiency. The shaped sheet is released and trimmed with cutting equipment. Excess plastic is removed around the rim and openings. Inspectors measure dimensions, check wall thickness, and look for cracks, wrinkles, or sharp edges. In practical production, the first sample is rarely perfect. A mold vent may need adjustment, or heating zones may require a second review. That correction often prevents larger batches from failing.
Vacuum formed trays are shaped from heated plastic sheets. A machine softens the sheet, then vacuum pressure pulls it over a mould. After cooling, the formed sheet is trimmed into a precise tray. This process suits products with unusual shapes, fragile surfaces, or strict presentation requirements. Tray walls can include pockets, ribs, and finger gaps. These details reduce movement during transport.
Common uses include electronics, medical devices, food items, hardware, and retail components. A well-designed tray holds each part firmly, which can reduce scratches, crushing, and assembly errors. It also supports faster picking because workers can see every item immediately. Grand View Research valued the global thermoformed plastic products market at approximately 46 billion dollars in 2023. That figure reflects broad demand, not vacuum formed trays alone. Still, it shows why manufacturers continue choosing formed packaging.
Vacuum forming can use less material than some rigid moulding methods. It also allows quick mould changes for short production runs. The trade-off is easy to miss. Thin trays may crack under heavy impact, while complex designs can increase trimming waste. The U.S. Environmental Protection Agency reported that containers and packaging made up 28.1% of municipal solid waste generation in 2018. Therefore, recyclability needs practical testing, not optimistic claims. Designers should specify compatible materials, reduce excess plastic, and check whether local facilities accept the tray. A tray can protect a product. It can also become unnecessary waste.